Make the below changes in the Advanced BIOS config settings. You may either select Gen 1 or Gen 2. But be consistent throughout:
If Only Installing 1 or 2 GPUs, Install in This Order
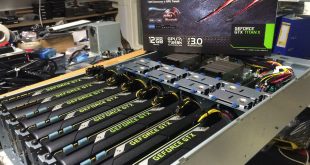
- First GPU goes into PCIEX16_1
- Second GPU goes into PCIEX16_2
If this order is violated (i.e., the 16x are left empty while others are filled), the M.2 slot closest to the CPU will not read the attached GPU.
- Boot > Above 4G Decoding: Enabled
- Advanced >
- PCH Configuration > PCI Express Configuration > PCIe Speed: Gen 2
- System Agent (SA) Configuration >
- DMI/OPI Configuration > DMI Max Link Speed: Gen 2
- PEG Port Configuration >
- PCIE16_1 Link Speed: Gen 2
- PCIE16_2 Link Speed: Gen 2
- PCH Storage Configuration > Disable Unused SATA ports: Disable all except where your SSD is plugged-in. You can also disable the M.2 Shared channels (SATA6G_5 and SATA6G_6). Our SSD plugged in SATA6G_2 (and a spare in SATA6G_1), so we disabled ports 3 through 6.
- USB Configuration > Single Port Control > Disable unused USB ports: Disable 9 through 14 (All USB 2.0 ports)
- APM Configuration > Restore AC Power Loss: Last State
- Onboard Devices Configuration > HD Audio Controller: Disabled
Disabling Uneeded Options
As a side note, in order to reduce power consumption as much as possible, we disabled unused SATA and USB ports as well as the audio controller and LED disco lights.
After you made these changes press the F10 hot-key to save and reboot.
Source: https://codesport.io/mining-tutorials/modding-the-asus-prime-z270-a-to-support-9-gpus/